How to Get Started With Speciality Garden
Specialty gardening is not a new concept. You can get started with it differently, depending on your needs and how much space you have available. It’s especially true for container gardening and hydroponics.
If you’re looking for all-year-round gardening, then container gardening is the best choice. It allows you to garden in any season irrespective of your outdoor climate.
You can grow plants in more accessible containers, have less chance of growing weeds in it, and require the use of fewer gardening tools.
This chapter will discuss how to get started with container gardening and then talk about another low-maintenance gardening style called hydroponics.
Container Gardening: What do you need to know?
If you have never heard a term called container gardening, you might be wondering what exactly it is?
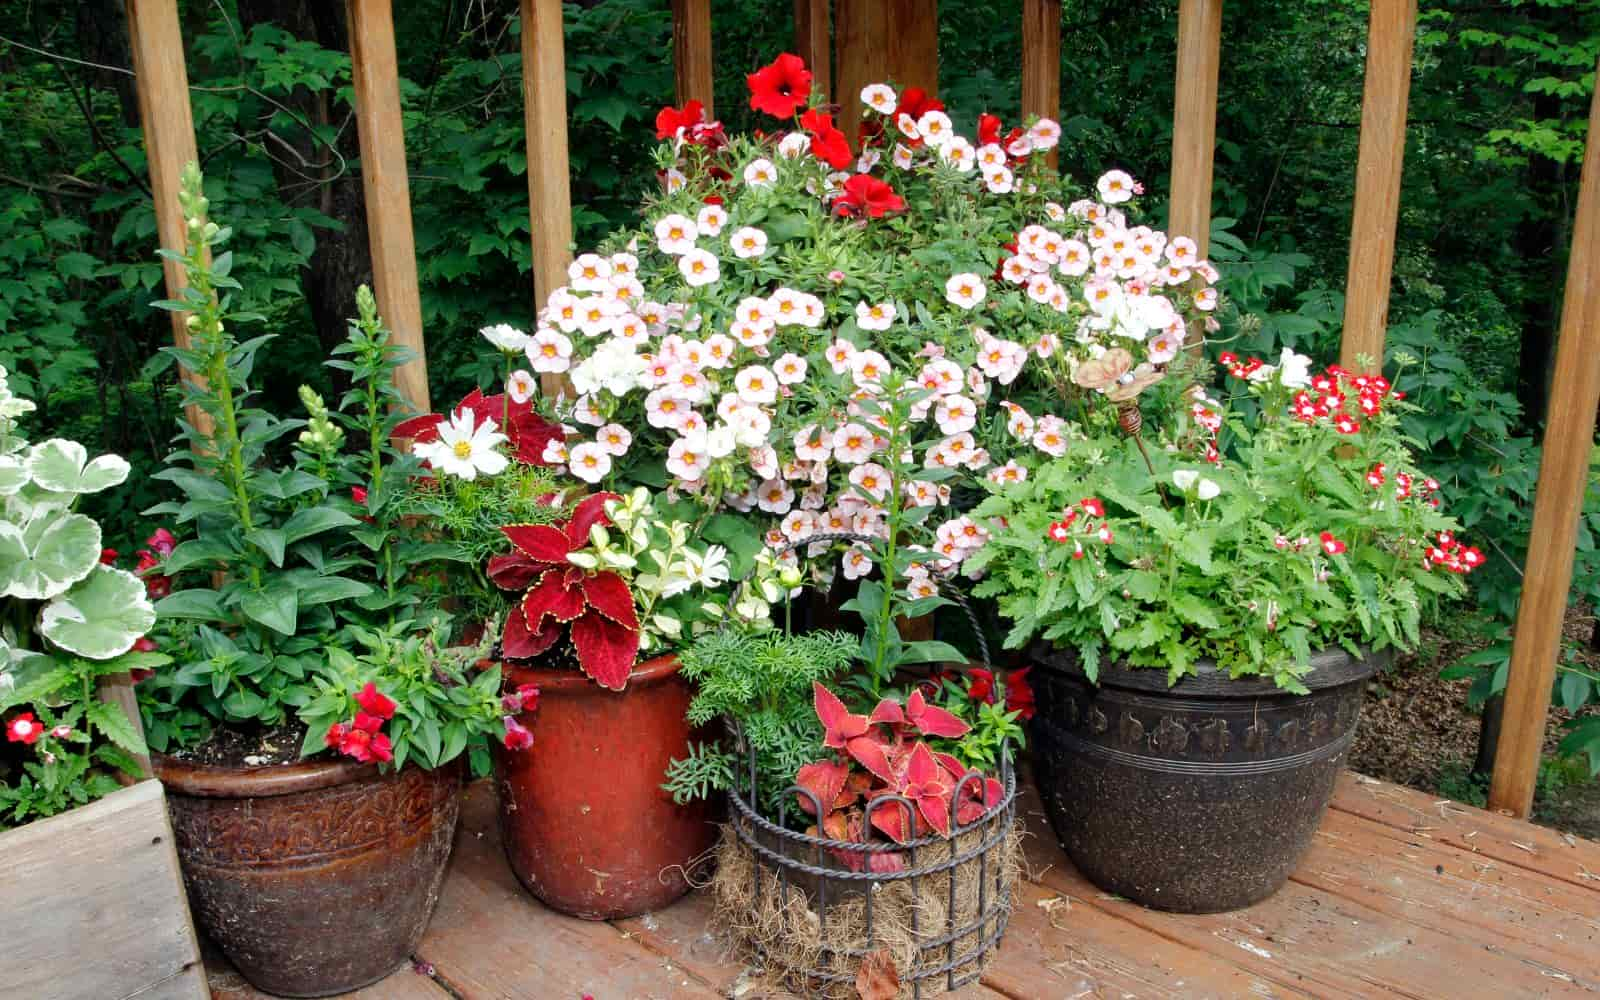
Container gardening involves growing plants such as fruits, herbs, and vegetables in containers. It’s popular among urban people, especially among those who live in high-rise apartments and don’t have access to outside space.
Container gardening is easy to get started and often costs less than traditional gardening. It’s great for people who are either new to gardening or want to get started without investing too much in it.
You can create a beautiful and fruitful garden space using high or low maintenance, depending on what works for you. It’s also ideal for those who don’t have the good physical health to manage rigorous gardening tasks.
Since so many people live in cities and towns, we are increasingly pushed for space. Yet many people want to grow their food, flowers, or herbs.
However, don’t consider container gardening as only suitable for people with limited space. Even for people with plenty of space, container gardening is a great way to maximize space usage. They can grow extra plants or even grow plants that won’t be possible otherwise due to poor climates.
When you are getting started with container gardening, you should be asking the following questions first.
- Where do you want to do your container gardening?
- What types of flowers or fruits you want to grow?
- When do you want to plant?
- How do you plan to handle weeds?
- How do you want to set up irrigation?
By having a proper understanding of your needs and the resources you have, you can successfully grow plants with the best results.
Container Gardening is a great start for people with limited gardening space
How to correctly choose a container gardening location
Plants and vegetables need sunlight and proper air ventilation to grow fully. They are not going to survive long without sunlight and little space to grow.
Sunlight and airflow are an essential part of their growth. For most plants, the more sunshine, the higher the chance of your garden to flourish.
On average, plants need about eight to ten hours of sunlight daily. Choosing a place where plants can get unobstructed sunlight is essential for container gardening.
What can you plant in container gardening?
Some plants are more suitable for container gardening than other plants type. Your choice of what to plant will depend on the resources you can provide.
When you are deciding on plants, choose whether you are planting for aesthetics or consumption. Planting for aesthetics such as ornamental flowers requires you to consider the type of materials to use, how high above the ground, and the plant species you can employ.
Planting for consumption requires more attention toward the soil type, depth, and sizes of bedsteads. Planting common edible plants such as tomatoes, peppers, potatoes, and cucumbers can provide you a mixture of aesthetics and consumption.
It looks good growing in your home while providing an adequate healthy supply of organic food at home.
When can you plant?
It’s vital to know when you can get started planting in container gardening. It determines your choice of plants, the current climate, and the proper growing condition.
Depending on your living area, some plants such as broccoli thrive in the cold season, whereas tomatoes may require mild weather. Each plant has its own best time to plant them.
Doing your research beforehand and jotting down frost dates, and measuring soil temperature helps you determine the right time to plant.
How to handle weeds?
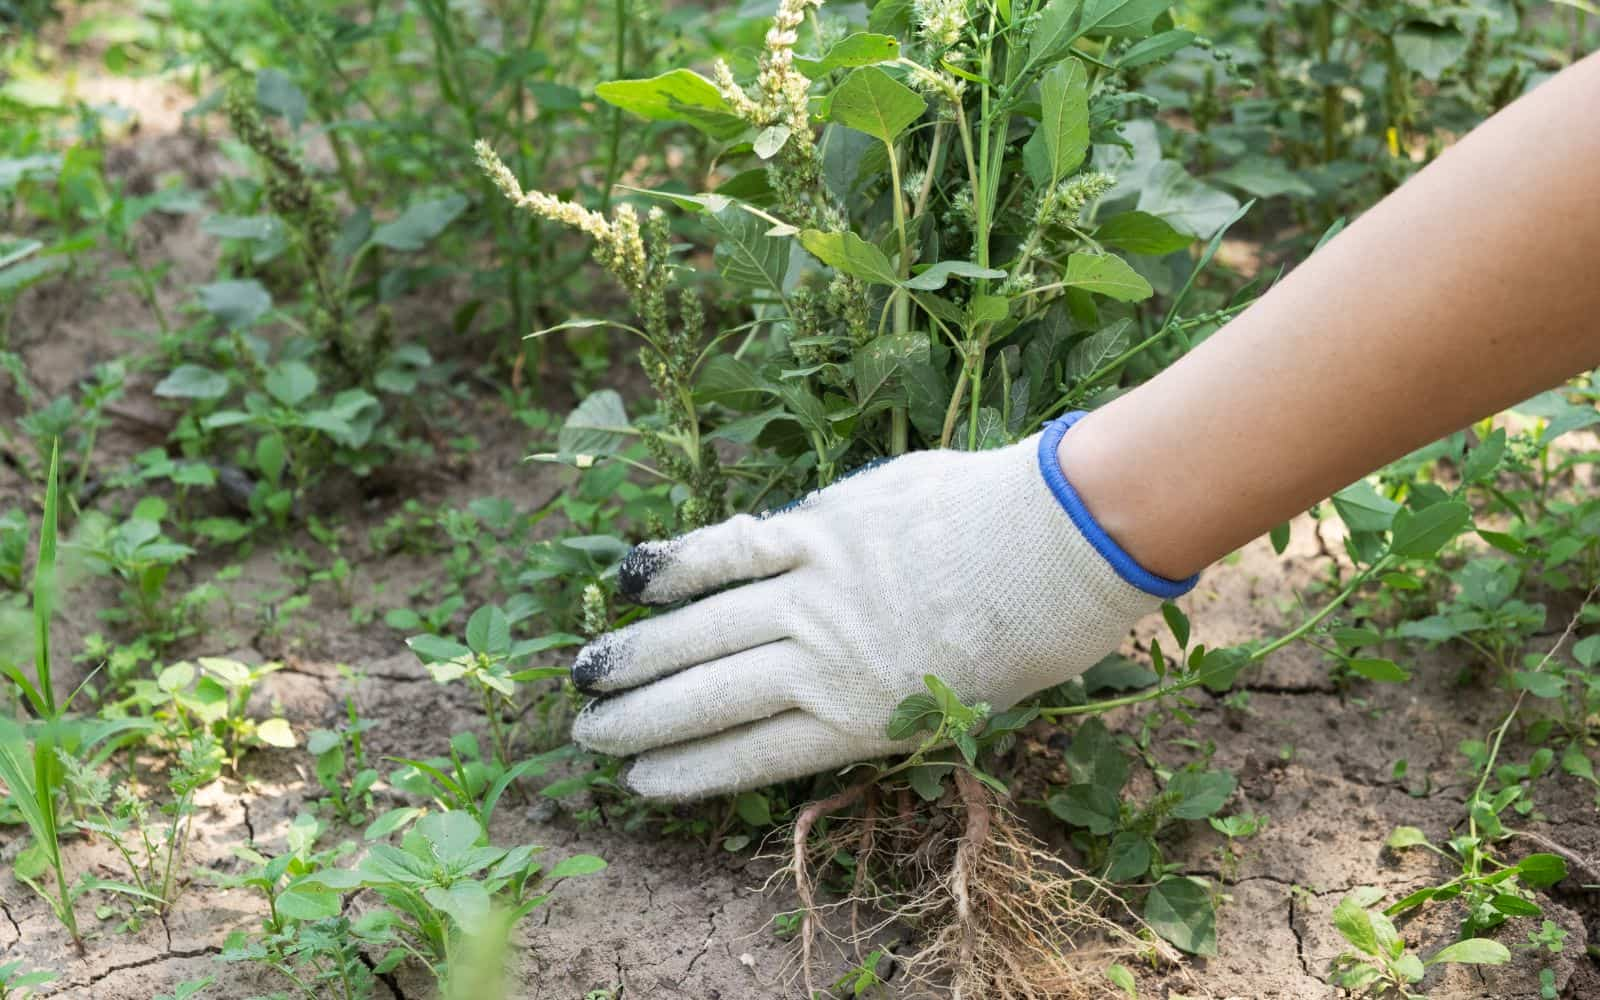
Weeds are unwanted plants that grow anywhere where it finds space and the right condition. Weeds are not only undesirable and unappealing to the eyes, but they also compete with your planted crops for nutrients and space.
You should keep an eye on growing weeds and remove it while it’s still young. You can weed out using simple garden tools such as hoes or using hand trowels.
For extensive size container gardening, you can also use weed killers to eliminate them in an environment-friendly way. Follow the instructions provided by the manufacturers and use them within specified periods as prescribed.
You should also remove weed seeds when adding topsoil to the garden. This reduces the number of weeds you may need to remove later.
How do you want to set up irrigation?
The right amount of water is vital for the proper growth of plants. Without water, plants will dehydrate and wither away. You need to have a plan on how to water your plants.
For a small size garden, you can water as needed. But in the case of a large garden, you may have to consider some irrigation mechanism. In most cases, a sprinkler or underground piping can give you the best long-term results.
If you don’t have bedsteads laid yet, you can ensure that plumbing work is done so you can quickly install an irrigation system without needing to dig further.
You may also consider collecting rainwater as it will significantly reduce the water bill.

Hydroponics: How to get started with hydroponics?
Hydroponics gardening is gaining popularity among urban and traditional gardeners. The main reason is the ease and convenience of getting started. With a hydroponic system, almost all types of plants or flowers can be grown.
So, what’s the main difference between hydroponics and traditional gardening?
The main difference between hydroponic and traditional plant growth methods is that hydroponic cultivation is done without needing soil.
The plants are grown in a water-based solution that contains the required nutrients and minerals needed for healthy plant growth.
The word hydroponic combines two Greek words, “hydro,” which means water, and “ponico,” which means work.
The primary purpose of using hydroponic systems is to provide the plant with three essential things to grow appropriately. These are light, nutrients, and water.
When these conditions are met, the plant grows strong and healthy while producing a high yield.
If you want to know if hydroponics is right for you or should you stick to traditional soil-based gardening, then consider these benefits of hydroponics:
- Hydroponics allows you to grow food all year long
- You have better control over the level of nutrients to provide to plants
- Growing with a hydroponic system is highly productive
- You can create hydroponic systems in any size of indoor space
- Hydroponics use about 2 – 3 times less water than traditional gardening
- Plants that are grown hydroponically usually taste better and provide more nutritious foods
- It’s a cheaper and affordable way to get started with gardening
There is also some disadvantage of hydroponic and the biggest one is the higher cost in the long run.
Now don’t get me wrong. It’s very affordable to set up a hydroponic system initially. But as you expand, it can become quite expensive to purchase all the equipment and accessories needed to scale hydroponic gardening.
If you decide that a hydroponic system is for you, you need to get these essential items.
| Tank | Air or submersible pumps |
| Plants | pH kit |
| Grow lights | Tray and lids |
| Reservoir | Mineral-based water-soluble nutrients |
| Total dissolved solids (TDS) meter for professional growers | Hoses |
| Heating system for cold seasons | Growing medium such as coconut coir, gravel, perlite, vermiculite |
| Air stones | Tubs |
What is the EC level in hydroponics?
When you look to shop around the hydroponic system, you may have come across the EC level. EC stands for electrical conductivity, and it’s vital to measure the EC level of your nutrient solution. It’s also referred to as CF, which stands for conductivity factor.
The pH level gives you information regarding the nutrient balance. In contrast, the EC level gives you an idea of how many nutrients are available.
The dissolved minerals and salts in water make it able to conduct electricity. Most plants need an EC level between 1.2 to 1.6 during its vegetative stage and between 1.6 to 2.4 during the flowering stage.
Keeping proper track of EC gives you a more detailed insight into what is happening in your nutrient water. A stable EC level means that the plant is taking in as much water as nutrients and keeping it balanced.
What are the different types of Hydroponic systems, and how can you get started?
There are six types of hydroponics systems.
1. Nutrient Film Technique (NFT):
It consists of a regular flow of nutrient solution to the plant. You don’t need a timer for a submersible pump. The solution gets pumped into the growing tray and flows over the roots that drain back into a reservoir.
It’s cost-effective as the solution is caught and recycled but needs more maintenance since the pumps have to run consistently.
2. Wick system:
It’s also known as passive hydroponics as there isn’t any moving part. The nutrients get drawn into the growing medium by using a wick. It utilizes various growing mediums such as coconut, pro-mix vermiculite, and perlite.
It’s suitable for smaller size plants that won’t need much water or nutrients. It’s simple and easy to build and great for beginners and children.
3. Aeroponic:
Plants get suspended in the air while the nutrient-rich solution gets sprayed onto the plant’s root. You can either do it manually or install a high-tech system to do the spray.
Since aeroponic has air as a growing medium, the plant roots need to be regularly misted with a nutrient-rich solution. The exposed root in the air makes it dry quickly, and frequent misting in a shorter interval is required.
You can grow almost any type of plant as long as you make sure the mist nozzle can spray the whole root system.
Hydroponics: Grow plants without needing soil
4. Drip Hydroponics:
Drip system hydroponics is the most commonly used system. It’s effortless to operate as the timer controls the pump to drip the nutrient-rich solution onto every plant’s base through a drip.
There are two types of drip systems: Recovery and non-recovery. The recovery system uses nutrient solutions more effectively because it reuses the solution.
The non-recovery system is much easier to maintain as it doesn’t need to recycle back the solution into the reservoir.
5. Deep water culture:
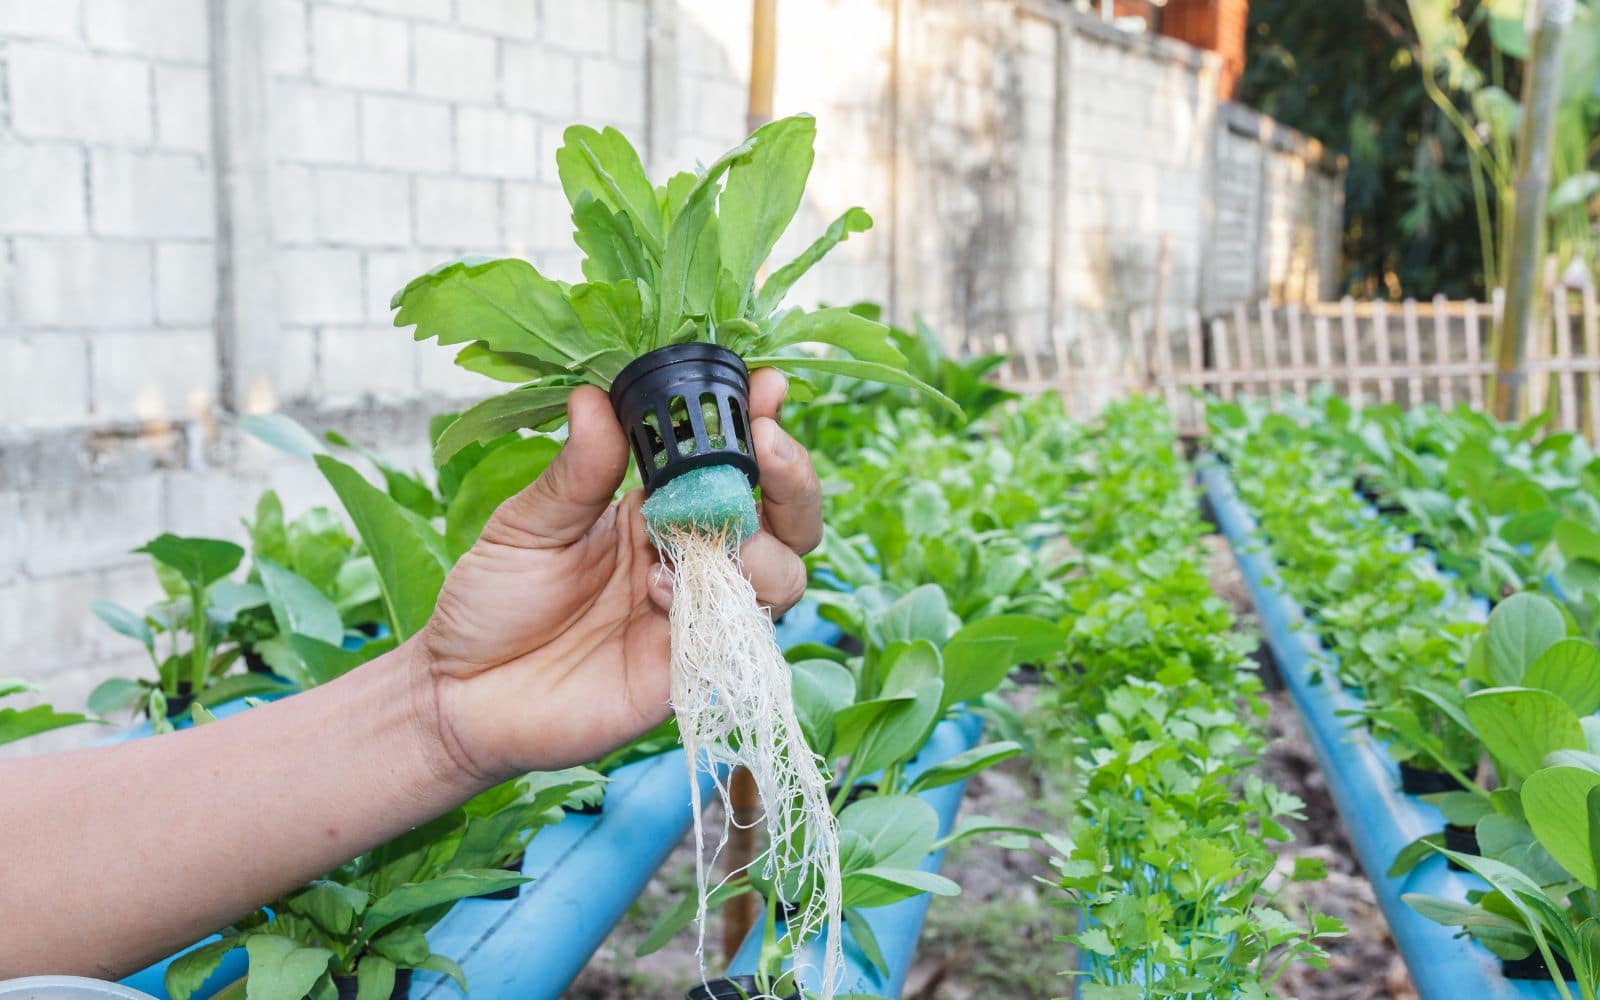
In deep water culture, the plant’s roots are dipped in the nutrient solution, and oxygen is blown right on the roots by a diffuser or air stone.
You use a net pot with a growing medium to plant where it uses the required amount of nutrients and oxygen to grow fast. This system works well for most plant types, including large plants with an extensive root system.
Another variation of this system is known as a bubble bucket. In this, you take a five-gallon bucket and make a hole in it almost the same size as your net pot. Then fill the bucket with a nutrient solution and set the net pot with your plant into the hole.
You have to ensure that solution doesn’t reach the top of the bucket and leave the bottom of the stem dry. This is a relatively inexpensive system that you can make from recycled aquariums or other watertight containers.
6. Flood and Drain (Ebb and Flow) Hydroponics:
This is quite popular among gardeners due to its simplicity. For this, you put your plants in large beds filled with a growing medium.
You then flood it with nutrient solution until it reaches a certain level. A drain allows the water to get to a couple of inches below the top to prevent overflow.
A submersible pump connected to a timer stops the pump at a specific interval. It allows the water to run back down and then drain the bed entirely.
It’s a versatile system that can be used with various mediums. Most plants can be grown with this system, including some types of root veggies.
However, be careful with plants that may grow oversize. You have to make sure that you provide it with enough nutrient-rich solution to fill it up.
What are the best plants to grow with a hydroponics system?
Although you can grow most plant types with a hydroponics system, edible plants such as vegetables are the best plants to grow.
For example, plants used for salads, radishes, and celery are just a few examples of plants that you can grow successfully with a hydroponic system.
Here are some vegetable plants that have a very high success rate of growing with hydroponics.
Beans
You can grow beans indoor or outdoor in winter or summer. Different types of beans are produced, such as pole types, that can be grown vertically and planted relatively close.
Beans need less oxygen to grow than other plants, so you can reduce the growing space and plant more beans.
Beans are a rich source of vitamins and minerals and require significant potassium, phosphorous, and sulfur. You have to keep some patience while growing beans, as it usually takes longer to produce.
Cabbage
Cabbage is excellent for salad and cooking with other vegetables. As with other leaf lettuce, you can use a part of it for dinner and let the remaining portion grow.
You should plant these six inches apart, and it needs cold weather and a high level of nitrogen, iron, and phosphorous.
Carrots
Carrots are root vegetables. Due to the growth medium’s depth, gourmet carrots are more accessible to grow than ordinary varieties.
You should plant them about an inch and a half away while ensuring it gets enough potassium and phosphorous in the solution.
Cauliflower
Cauliflower is a bit tricky to grow as it’s susceptible to temperature fluctuations. You can grow it with other plants but make sure it’s grouped with other moderately cold needed plants.
You should provide it with enough space and keep it about 20 cm away. During growth, it requires large quantities of nitrogen, iron, and phosphorous.
Celery
It’s another excellent vegetable salad to grow that is full of nutrients and minerals. It grows best on the cold side but not in extreme temperatures.
To get started growing celery, you should plant it about five inches apart.
Cucumber
You can grow cucumber along with lettuce and tomatoes. It’s easy to grow and comes in different varieties.
If you don’t want to pollinate, you can plant English or seedless well-suited for indoor use or in a greenhouse. Cucumber plants like warm weather and direct sunlight.
Peppers

There are so many different colors and types of peppers you can grow. The most popular are the green bell, yellow banana, or chili.
You can either grow them together or individually. Peppers want warm weather more. Set it six inches apart and watch for damping.
Remember that Peppers are slightly harder to grow inside than outside. They need a high level of light that is sometimes difficult to meet with indoor light.
Tomatoes
Tomatoes are a poster plant for hydroponic growth. These are one of the best and most successful hydroponic plants. You should seed bush or patio tomatoes indoors, so your plants may be well below your lights.
The bush variety tomatoes are easier to work in hydroponics. You can plant the seeds indoors under the light in February or March and then transfer them outdoor in April or May.
Blueberries
It’s not only vegetables grown through hydroponics but fruits such as blueberries can also be grown successfully.
Everyday Maintenance routine for Hydroponics system
Proper maintenance is essential to keep your growing system in optimal condition.
You should regularly check the plant grown and prune any dead leaves. Check if any plant is infected with a disease so it does not spread to other plants.
Here are some regular maintenance schedules of hydroponics systems.
Clean Drippers Regularly
Drip feed hydroponic system use drippers that get obstructed if not cleaned regularly. The most common reason for obstruction is mineral deposits at its nozzle.
You can easily remove it by filling vinegar in a container, letting the dripper settle in there for a couple of hours, and then thoroughly washing it.
Drippers are inexpensive but often need to be replaced. Having a couple of additional drippers is handy to replace the malfunctioning part.
Maintain the pH level
In a hydroponic system, never let the solution pH level go below five or above seven. Beyond that range, plants can’t promptly take up nutrients.
The pH level continually fluctuates depending on the growth state. For example, during vegetative growth, the pH level goes up, a sign of healthy development.
But high temperature and green growth in supply also make pH go up, not suitable for the plant.
Ebb/Flood system maintenance
When you are implementing Ebb/Flood system hydroponics, you should get a clock and set it at a shorter interval.
This helps you better control the cycle. To maintain an optimal distance from salt development, you should top water your plants once every week. You should avoid top watering with plain water as it will stun plants.
Disease prevention
At the end of each harvest, you should disinfect the whole hydroponic system to help stop any yield sickness problems. This helps remove any pathogen, green growth, sludge, and dead plant matter.
Follow these steps for proper cleaning of the hydroponics system:
Stage 1: Remove all plants and media to clean the system manually. It’s vital that you properly dispose of removed dead and diseased plants to prevent the spread of infection.
Stage 2: Fill up the reservoir with clean water. Lower the water’s pH below five and add chlorine bleach.
Stage 3: Mix it thoroughly and let it remain there for the next 24 to 72 hours. You may have to gently brush the surface to remove contaminants or green growth from the system.
Stage 4: Drain the chlorine and thoroughly wash the system. Flush it a few times with clean water to remove chlorine and other contaminants.
Stage 5: If your hydroponic system contains drippers and sprayers, you may have to disassemble and clean every unit independently. Refer to the owner manual to remove it safely for cleaning.
Stage 6: Assemble all removed parts and set up your growing medium to get started with a new batch of growth.

Raised Bed gardening for beginners
If you love to eat fresh, natural vegetables and don’t want to deal with the hassle of pulling weeds or adding a significant water bill, you should consider the idea of raised bed gardening.
What is raised bed gardening?
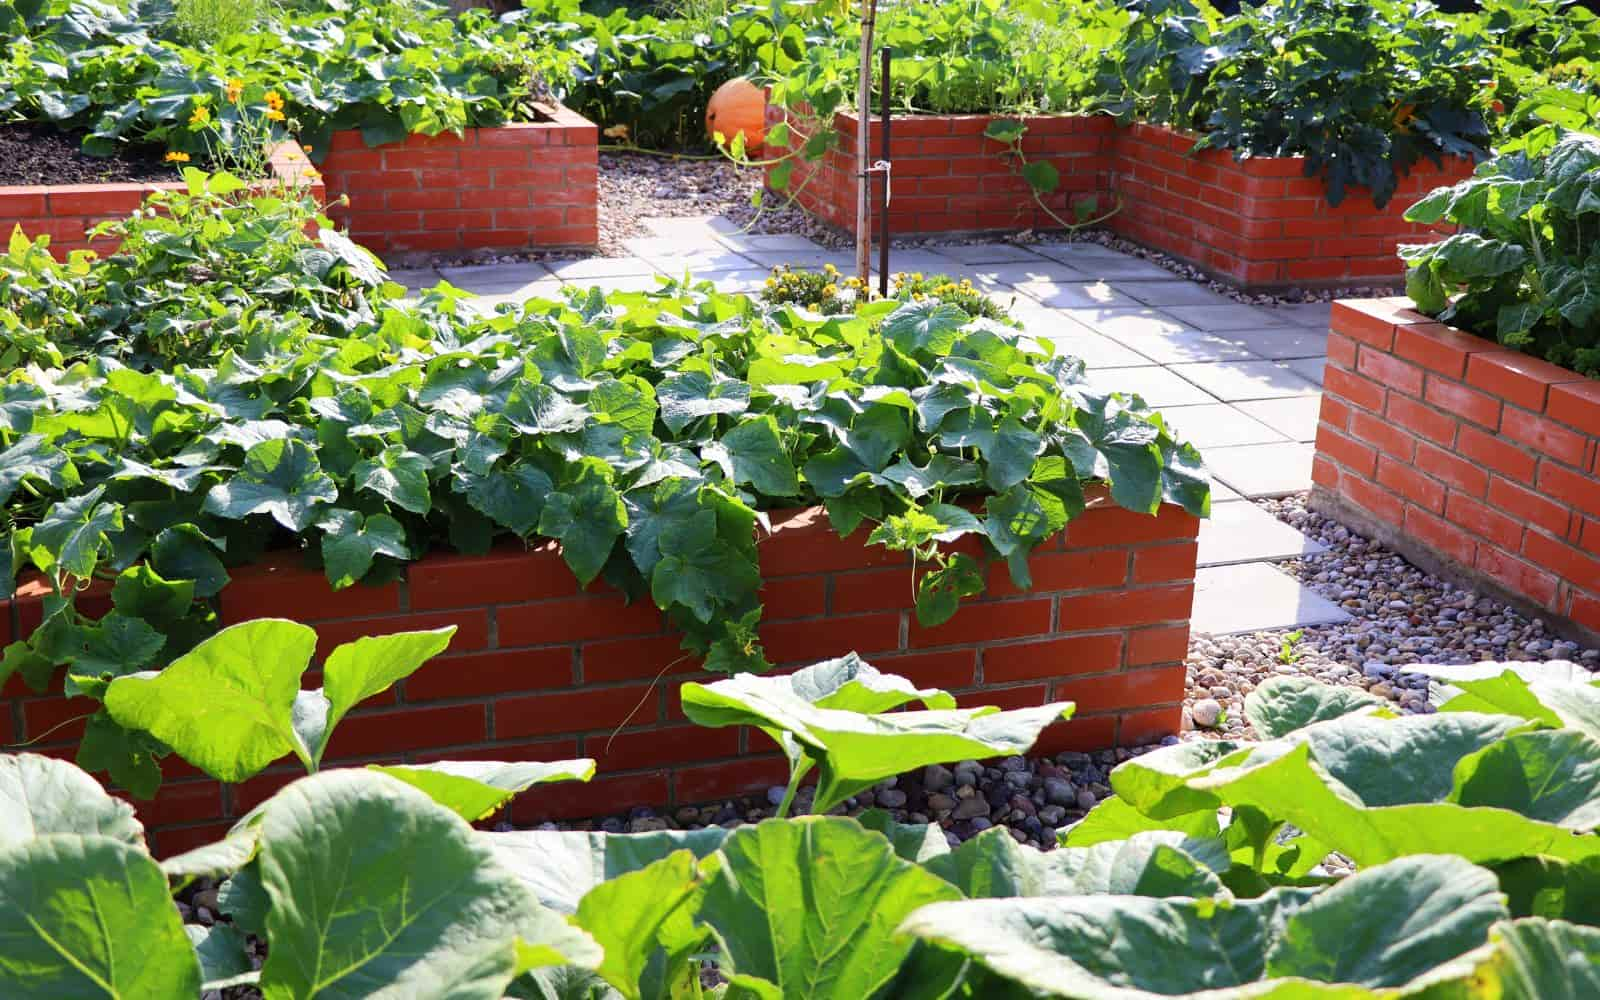
Raised bed gardening is a gardening type in which the soil is shaped in beds but is raised around 3 to 4 feet long.
The soil is elevated above the ground and is covered by a structure constructed from rock or stone blocks. You can fill it with fertilizers such as compost and manure.
The plants inside the raised bed garden are arranged out in rectangular shape, far closer together than traditional row gardening.
The shorter distance between plants allows the leaves to grow close together when fully grown and prevents the sunlight from passing through to the weeds growing underneath it while controlling soil humidity.
Why getting started with raised bed gardening is easier and more beneficial?
Raised beds provide a range of advantages for the growers. Here are five reasons you may consider building a raised bed garden rather than the traditional garden.
High-quality soil available to plants
A raised garden sits over the present soil level, and you top it off with the soil.
You can add high-quality weed-free and nutrient-rich soil at the top that provides the best growing environment for plants.
Improved drainage
The raised bed soil is usually loose and not compacted like the regular yard soil. A raised garden offers preferred drainage over most gardens.
Excess water in the soil may cause root rot or develop fungus. The proper drainage ensures nominal moisture in the ground.
Lower maintenance and higher yield
If you need to develop more plants in a smaller space, raised garden beds are ideal.
You can plant close to each other because the grounds are structured to such an extent that you won’t have to move around in the plants’ middle for maintenance.
Moreover, growing plants together allows you to seed more plants per square foot.
Less Care required
Raised garden beds need less care as plants such as Blue Star Creeper grow above the usual ground level. This reduces the chance of growing weeds or other insects getting onto the plant.
You can structure your bed that is close to 4 feet wide at any spot, and afterward, if you have more than one bed, place them 2 feet from one another. Sufficient spacing allows you to remove weeds and put down mulch quickly.
Less soil compaction
A raised garden bed has less soil compaction that improves the aeration of the plant roots.
These are also easy to build and can be raised as much as you need. You can develop it from old woods that holds the soil together loosely.
Simple steps to start raised bed gardening
Getting started with raised bed gardening is straightforward. But having a planned approach can help you get the best results fast. Regardless of the type of native soil you have, building up beds allows you to create the ideal soil mix to plant anything.
Step 1: Choose the location of the raised garden bed
You should choose a location that is free from weeds and rocks. The location should be easily accessible to move around after you have seeded the land.
Step 2: Materials to use for construction
You can use recycled materials to construct raised garden beds. Here are some common materials that can be recycled:
Tires: You can use it to grow potatoes and other vegetables by adding circular elements to your garden. Be aware of the heavy metals used in the tires that may leach into the surrounding soil.
You can use it to plant ornamental flowers rather than grow consumable vegetables.
Pallets: Pallets are the perfect source for garden beds. You can often get it free from retailers that used it for packaging and transporting goods. Be sure that pallets are not treated with harmful chemicals such a methyl bromide.
Treated lumber: Treated lumbers are very sturdy and can hold up a long time.
Wood: This is the most common building material for raised beds that also cost less.
You can use rot-resistant trees such as cedar or redwood. These are simple to build and readily available in most places.
Rocks: A big sturdy pile of stone can also be used for raised bed construction. These look natural in your garden and, once constructed, require little upkeep and last forever.
Step 3: Map the area
Map your garden area and be clear about the raised garden bed’s shape and size. You want to maintain enough spacing so you can move around without needing to step on the plants.
Step 4: Level the Edges
Use a level edge so you can set up proper water flow to the bed. An unlevelled bed may cause water to fill one spot and run over another rapidly.
Step 5: Start the Planting
Plant vegetables and fruits in the garden. You can use companion plants to ensure the best possible growth and yield available.
Herbal Gardening
Plants have medicinal properties, and various researches have proved that herbal medicines can cure critical medical problems.
New research and benefits of herbal plants lead to medical practitioners recommending their patients to use herbal medicines rather than modern contemporary medicines.
You can grow any of these herbs based on the techniques we discussed earlier. Although there are thousands of herbal plants with several health benefits, we will discuss the top 5 herbal plants to get started in your garden.
Lemon Balm
Lemon Balm is also known as “Melissa Officinalis,” which helps relieve stress and stimulates the nervous system. It’s a perennial plant of the Lamiaceae family that grows up to 150 cm in height.
Lemon balm leaves have herbal benefits. Research has shown that it can be used as a tranquilizer without having any adverse side effects.
Medicinal Properties:
It’s a handy herbal that provides relief as a result of animal bites, sores, mosquito bites. It can also be used internally to treat headaches, insomnia, depression, fever, stomach gas, colds, and cough.
How to grow:
It needs a neutral soil pH of 7 and can be grown indoors and outdoor. It needs full sunlight, so place it where it can get direct light. If you are growing in pots, you can transfer them to sunlight for five to six-hour each day.
Maintain proper drainage as roots don’t like to be water-soaked, and apply fertilizer sporadically. It’s a perennial plant that grows up to one-foot high.
Rosemary
Rosemary is also known as “Rosmarinus Officinalis.” It’s a perennial herb with needle-like leaves and pink, purple or white petals.
Medicinal Properties:
Rosemary is an excellent oxidant and rich in Vitamin K. Regularly taking rosemary can also help treat Alzheimer’s disease. It improves memory, focus, and concentration.
The herb is also useful for antiviral, antiseptic, and disinfectant purposes.
How to grow:
You can grow rosemary through good-quality seeds that you can buy from local garden centers. You can plant it in late spring and have seeds placed about a quarter-inch deep and 30 inches apart.
Prepare your soil in advance to make sure it’s rich in nitrogen and drains well. The preferred pH level of the ground is 6.5. Water it gently as it grows. Also, make sure that it gets enough sunlight when growing indoor.
Sage
Sage is a medicinal herb, also known as “Salvia officinalis.” It falls under the mint family and has gray leaves of about 6 centimeters. It has a pleasing smell and is also used for cosmetic purposes such as shampoo and soaps.
Medicinal Properties:
Sage is used for treating digestion-related issues, depression, and overall good mental health. It’s rich in Vitamin K and contains antioxidants. It helps with memory focus and has good anti-inflammatory properties.
How to grow:
The recommended season to plant sage from seed is in late spring. You can use the layering technique when planting sage. Prepare the soil in advance, making sure it is rich in nitrogen and drains well. The preferred pH for growing sage is 6.5.
Water it gently throughout its growth and ensure there is enough sunlight when growing indoor. Keep an eye on the development of any pest as insects like to munch on delicate sage buds.
Herbal gardening is a great way to treat yourself without using synthetic chemicals
Garlic
Garlic is relatively easy to grow with impressive results. The best thing about home-grown garlic is its rich and robust flavor. There is a fascinatingly broad range of growing styles and tastes.
Medicinal properties:
Garlic has impressive abilities to lower blood pressure and cholesterol and is an antiseptic.
How to grow:
Young garlic is very hardy and will come through easily through cold winter weather. You can plant cloves in the autumn and check how much bigger the bulbs grow by July.
You can plant it anywhere from late September to mid-October after any summer crop has finished. You can harvest it from about the middle of May.
Don’t leave it underground for too long after maturity as the outer sheath of bulbs gradually starts to rot.
Aloe Vera
Aloe Vera is a versatile herbal plant that produces medicinal substances for several medical conditions and cosmetic products. The gel or latex made by Aloe Vera is yellowish and is extracted from the lower side of the plant.
Medicinal Properties:
Aloe Vera’s latex and gel have several healing properties that are antiviral, antiseptic, antimicrobial, and germicidal. The juice from Aloe Vera can be used to treat chronic constipation, stomach ulcers, and digestive problems.
How to grow:
You can grow Aloe Vera under a normal growing condition as it only requires sunlight and moisture to grow. You can grow it either using seed or cutting from an already thriving plant. It takes around two weeks to grow from seeds.
Aloe Vera loves a medium amount of water. If you live in a dry area, then make sure that water it regularly. You can also apply fertilizer when necessary.
Next
In this chapter, you learned all the fundamentals on how to build your specialty garden and get ready to have a beautiful-looking garden even if you have a big or small space.
Now we have covered the beginner part of starting a garden. The next step is to protect it from pests.
What Next?
How to Control Pest and Disease in Plants
Next, we’re going to show you:
- How do pest and disease damage your plants, and what can you do about it?
- How to use Integrated Pest Management (IPM)
- Over 20 different types of pest that you may encounter in your garden
- What can you do to control these pests and prevention strategies?

